Integrate Redmine 3 with Mercurial SCM on Ubuntu Server 16.04
This article is Part 3 in a 7 Part Series.
- Part 1 - Install Redmine 3 on Ubuntu Server 16.04
- Part 2 - Secure Redmine 3 on Ubuntu Server 16.04 with Let's Encrypt
- Part 3 - This Article
- Part 4 - Integrate Redmine 3 with Git SCM on Ubuntu Server 16.04
- Part 5 - Integrate Mercurial with SSH on Ubuntu Server 16.04
- Part 6 - Integrate Git with SSH on Ubuntu Server 16.04
- Part 7 - Install Sendmail with STARTTLS on Ubuntu Server 16.04
In this tutorial, we will integrate Redmine 3 with Mercurial SCM, a distributed version control tool.
Apache Integration
Install Mercurial from the PPA
sudo add-apt-repository ppa:mercurial-ppa/releases
sudo apt-get update
sudo apt-get install mercurial mercurial-server libdbd-mysql-perl libapache2-mod-perl2 libapache-dbi-perl
The last three packages are required for authenticating a Mercurial web client against the Redmine database via a custom Perl script shipped with the Redmine installation.
Enable the Apache CGI module
sudo a2enmod cgid
Then, restart Apache:
sudo systemctl restart apache2
Create the Mercurial repository directory
sudo mkdir -p /var/hg/repos
Create the Mercurial web cgi script file
sudo vi /var/hg/hgwebdir.cgi
Add the following content:
#!/usr/bin/env python
#
from mercurial import demandimport; demandimport.enable()
from mercurial.hgweb.hgwebdir_mod import hgwebdir
import mercurial.hgweb.wsgicgi as wsgicgi
application = hgwebdir('hgweb.config')
wsgicgi.launch(application)
Create the Mercurial cgi web config file
sudo vi /var/hg/hgweb.config
Add the following content:
[paths]
/=/var/hg/repos/**

[web]
allow_push = *
push_ssl = false
allowbz2 = yes
allowgz = yes
allowzip = yes

[hooks]
changegroup = /var/hg/changegroup-hook
Create the Mercurial changegroup hook file
sudo vi /var/hg/changegroup-hook
Add the following to the file:
#!/usr/bin/env ruby
require 'net/http'
require 'uri'

uri = URI.parse("https://[your_domain]/redmine/sys/fetch_changesets?key=[your_redmine_api_key]")
response = Net::HTTP.get_response(uri)

# response.code
# response.body
You can get your API key by logging in as an administrative user, then clicking the Administration Link at the top, then clicking on Settings. Under Settings, navigate to the Repositories tab on the far right and Enable WS for repository management. Then below it click the ‘Generate a key’ link.
NB: Don’t forget to save your changes at the bottom.
A changegroup-hook is code that is triggered automatically when a user pushes a commit to the server. In this case, it will refresh the Redmine timeline to reflect the newly committed code.
Set the correct permissions for the newly created files
sudo chown -R www-data:www-data /var/hg
sudo chmod gu+x /var/hg/hgwebdir.cgi /var/hg/changegroup-hook /var/hg/hgweb.config
Create an Apache config file
sudo vi /etc/apache2/conf-available/hg.conf
Add the following content:
# Use PerlLoadModule Apache2::Redmine when using apache2, or else you might get weird errors trying to authenticate.
PerlLoadModule Apache::Redmine
ScriptAlias /hg "/var/hg/hgwebdir.cgi"
<Location /hg>
  SSLRequireSSL
 AuthType Basic
 AuthName "Redmine Mercurial Repository"
 Require valid-user

 #Redmine auth
 PerlAccessHandler Apache::Authn::Redmine::access_handler
 PerlAuthenHandler Apache::Authn::Redmine::authen_handler
 RedmineDSN "DBI:mysql:database=[redmine_database];host=localhost"
 RedmineDbUser "[redmine_user]"
 RedmineDbPass "[redmine_password]"
</Location>
Subsitute the values in brackets with the Redmine MariaDB credentials created in the previous tutorials.
Check that the configuration file have the correct syntax:
sudo apachectl configtest
You should see:
Syntax OK
Add a symbolic link to Redmine.pm and Apache 2
sudo ln -s /usr/share/redmine/extra/svn/Redmine.pm /usr/share/perl5/Apache/Redmine.pm
sudo ln -s /usr/share/redmine/extra/svn/Redmine.pm /usr/share/perl5/Apache2/Redmine.pm
Enable the Mercurial Apache 2 configuration and reload Apache 2
sudo a2enconf hg
sudo systemctl reload apache2
Create a new test repository and project in Redmine
Create a test repo:
sudo hg init /var/hg/repos/test
sudo chown -R www-data:www-data /var/hg/repos/test
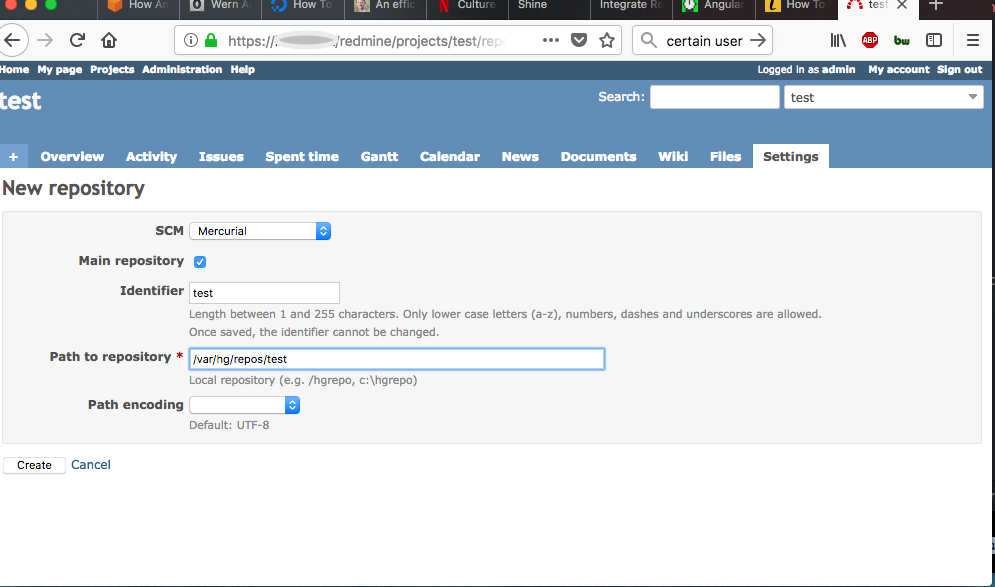
Create a new project with and identifier ‘test’
In the project Settings > Repository set:
SCM: Mercurial
Path to Repository: /var/hg/repos/test
Press the ‘Create’ button
Go to to the Repository tab of the test project

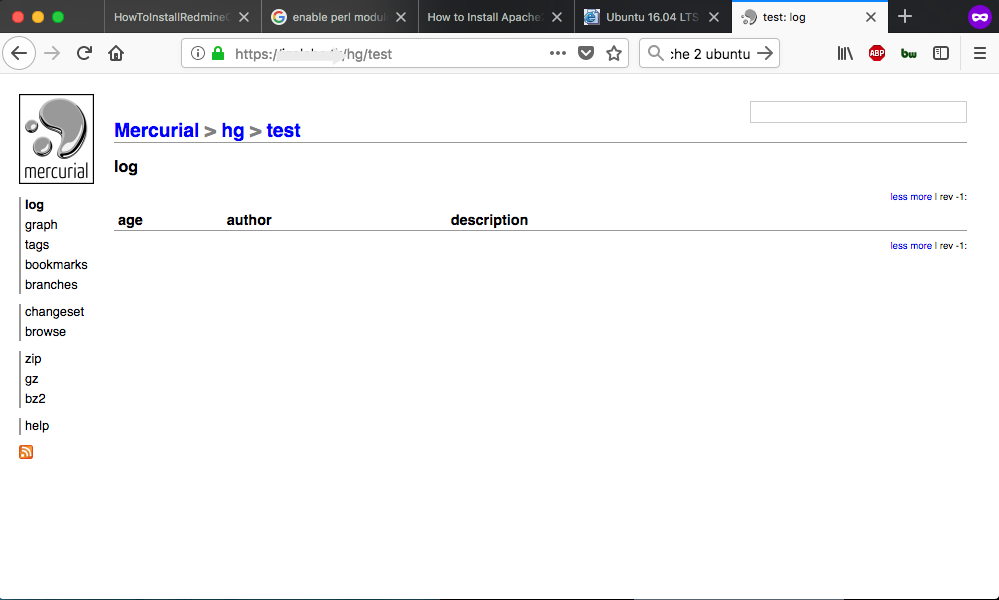
View the test repository in the web browser
https://[your domain]/hg/test

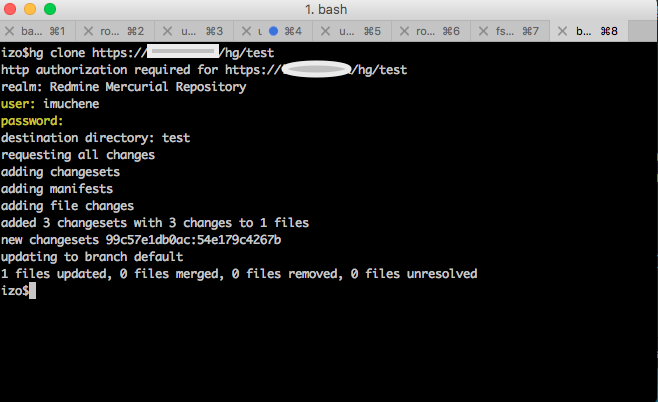
You can also clone your newly created repo on your local machine:

As the administrator, I created a test user called ‘imuchene’ and added him as a Developer in the test project. You can perform on the repo all other Mercurial operations: commit, push, pull, bisect, incoming, outgoing etc.
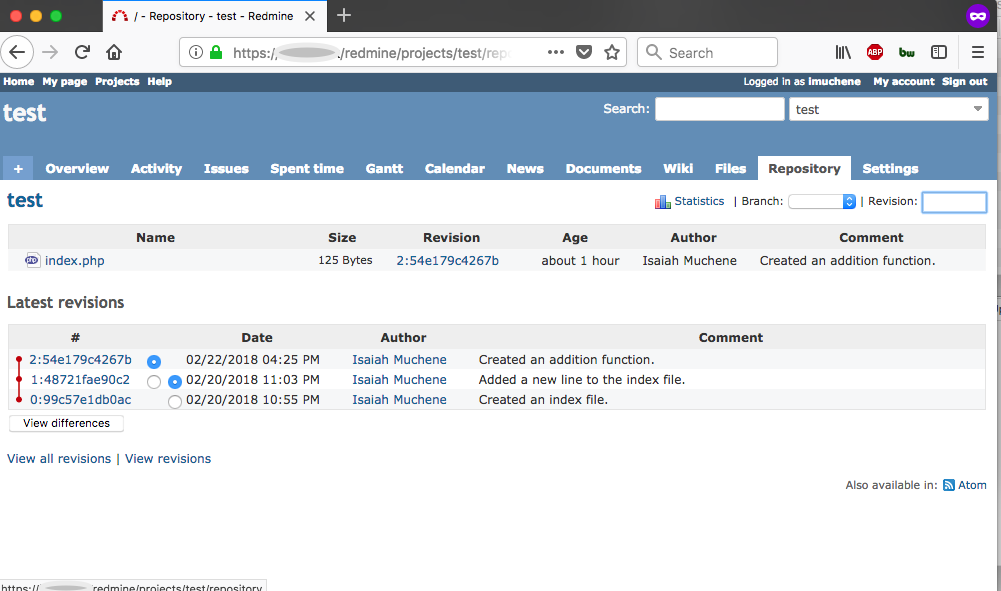
Here’s the repository view on Redmine for the same repo after I have pushed a few commits:
